
Dallas Fort Worth Roofing Company
Low Cost, High Quality Roofing
GAF Timberline Roofing

We Will Beat Any Bid or Estimate by 5%
Our GAF Roofing Process
Thanks for stopping by. We’d like to share with you our GAF roofing process, so that you’ll know what to expect. In providing the GAF limited lifetime System Plus warranty, it’s critical that the details are done right; otherwise, you don’t really have a warranty. The following steps are not just good ideas, they are requisite for GAF to honor your warranty.
Step One in the GAF Roofing Process – Tear-Off
Stripping the old roof down to clean decking is important for multiple reasons:
- Exposes any weak places in the decking. For a new roof to function properly, it needs a solid base. Excessive gaps in the plywood and/or plywood rot are not just dangerous for anyone that might walk the roof, they cause shingle nails to wiggle and create leak spots in your roof.
- Get the weight of the old shingles off the home! Shingles weigh a lot (some 200-250 lbs/”square”; 70-80 lbs/bundle; or 2-2.5 lbs/square foot), and it’s always good to get the extra dead-weight off your home. While placing a second layer of shingles may be permitted in some jurisdictions, anything beyond that (a third or forth layer) is prohibited. There’s really no reason to leave the old shingles up there, and even if you do, someone will eventually have to tear them off, so it’s not saving any money in the long-run.
- A third reason to strip the roof is to prevent “telegraphing” of old shingle patterns through the new layer of shingles.
GAF Roofing Process Step One – Arrival & Tear-Off of Old Roof
Step Two in the GAF Roofing Process – Replace Bad Decking and/or Fascia
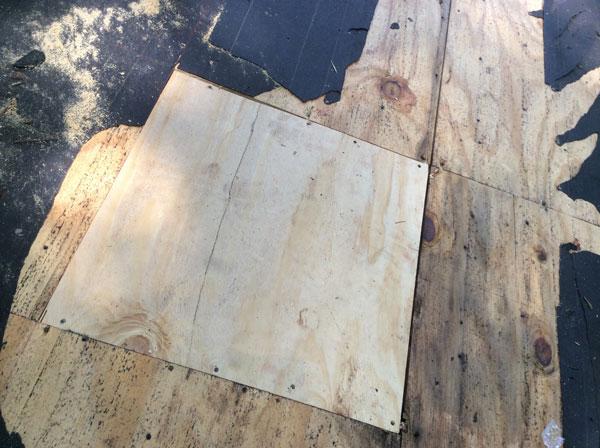
GAF Roofing Process Step Two – Replace Bad Decking
Step two also includes replacing any bad fascia. Once you remove rotted fascia, though, you often find rotted sub-fascia and/or rotted soffit, as in the picture below. The picture below also illustrates the importance of drip edge (the metal “trim piece” under the shingles, visible in the “after” part of the photo below) – this roof previously lacked drip edge, and a squirrel had managed to chew his way into the cornice and make a home there. In his spare time, he chewed on the wire going to the flood light! We found his dead corpse left in the cornice. Just another reason to install your roof correctly!
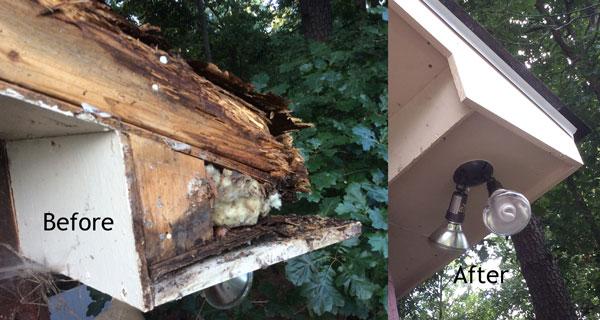
GAF Roofing Process Step Two – Includes Replacing Bad Fascia, Sub-Fascia, and Soffit
Step Three in the GAF Roofing Process – Install Drip Edge and Quality Felt Or Synthetic
GAF offers you some options for felt or synthetic – there is Shingle Mate®, Tiger Paw™, and Deck-Armor™. The Shingle Mate® is a high-quality felt, while the latter two options are synthetics. Tiger Paw™ is the best choice (in our opinion) for vented, asphalt shingleroofs (low-perm rating of less than 1 perm); whereas Deck-Armor™ is able to “breathe” (16 perms), which is perhaps good for conditioned, non-vented attic spaces. Low-permeability means an added layer of protection against rain and leaks. All of these options are going to lay flatter than typical felts, which is important for preventing “telegraphing” of waviness in the felt through the shingles. An added benefit for Tiger Paw™ and Deck-Armor™ is that they are very comfortable for roofers to walk on, which means greater safety.
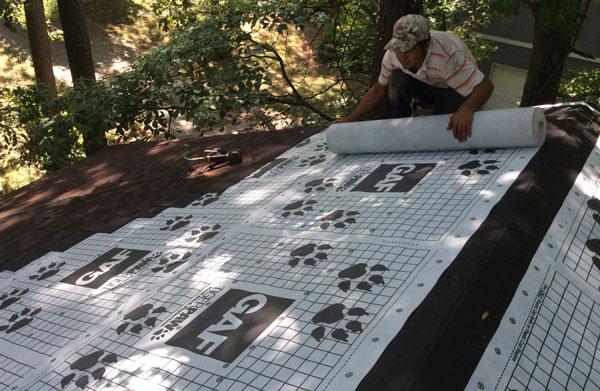
GAF Roofing Process Step Three – Installing Felt Or Synthetic
It’s also important to install drip edge. Drip edge should go under the felt at the eaves, and over the felt on the rakes, for best protection. Drip edge serves at least the following purposes:
- Keep insects and animals out of the attic.
- Provide a flat surface that keeps the overhanging parts of shingles from sagging.
- Protect the roof edges from wind-driven rain.
- Provide a “lip” for water to “drip” off of – instead of running down (and prematurely rotting) the fascia boards.
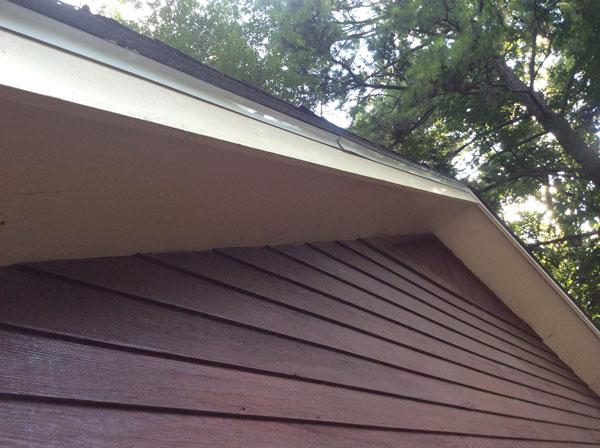
Drip Edge Is the Shiny White Metal Piece Just Below the Shingles
Step Four in the GAF Roofing Process – Installing Starter Strips On the Eaves and Rakes
While GAF offers a few options on starter strips, we prefer their Pro-Start® starter strip. Starter strip might not make sense to you, but basically is just aids in holding the ends of the shingles down at the edges of your roof. When wind blows on your house, the edges are a very vulnerable place where it can get under the shingles and start to blow off parts of your roof. The GAF Pro-Start® starter strip is nailed firm to the edge of the roof, and a special bead of asphalt sealant on the edge of the starter strip holds the shingles that will be installed above. Many roofers use 3-tab shingles turned upside-down as the starter course, but the problem with this is that the sealant is 5″ away from the edge of the roof, where it needs to be. Also, this erroneous installation prevents nailing close enough to the edge to sufficiently hold down the starter.
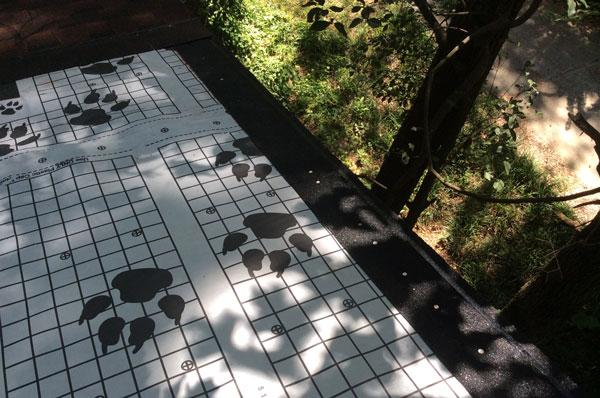
GAF Roofing Process Step Four – Properly Installing Starter Strip
Step Five in the GAF Roofing Process – Installing the Shingles!
We typically use a 6-hit nailing pattern, which increases the wind-rating of your GAF System Plus warranty from 110 mph to 130 mph (Category 3 Hurricane Wind Speed) when used in combination with starter strip on the eaves and rakes (also normal procedure for us). Further, we strive to keep the nails exactly where they are supposed to go – not too high, and not too low. If they are too high, your shingles can sag, de-laminate, or fall off over time; if they are too low, they are called “shiners” (they are exposed and can become a leak). It’s also important to keep an eye on shingle butt joints, to make sure that underlying nails are roughly 6″ away from the joint, to prevent a leak due to seeping water. We also watch out for “racking,” a corner-cutting method that makes installation quicker, but can also be seen from the ground in the final product (and makes it easier for wind damage to occur to your roof). Instead of “racking,” we “triangulate” the shingles, to keep a random look and provide maximum security against wind.
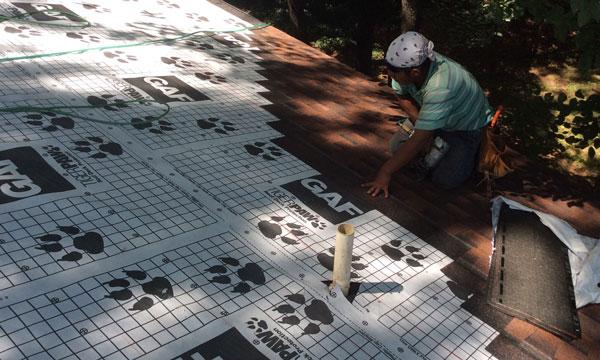
GAF Roofing Process Step Five – Installing the Shingles!
Step Six in the GAF Roofing Process – Properly Address Pipe Penetrations & Flashing Details
Almost all roof leaks occur around pipe penetrations (as in the photo above) or at flashing locations. These are areas where there is a discontinuity in the roof surface, and many roofers either don’t know what to do, or just don’t do it. GAF has a special, rigorous set of steps to ensure that any abnormality in the roof can be soundly addressed. For example, on pipe-penetrations, GAF calls for the installation of a roofing-underlayment patch, adhered to the felt/synthetic above the pipe, and emptying onto the shingles below. This way, if any water manages to get around the pipe boot, it will be diverted back out on top of the roof surface.
.jpg)
GAF Roofing Process Step Six – Addressing Pipe Penetrations & Flashing Details
Then, as an upgrade DFW Best Roofing uses LifetimeTool.com boots to seal around the pipe. GAF has partnered with LifetimeTool.com to warranty their boots when correctly installed and used as part of a System Plus warranty. If you’re going to get a lifetime roof, make sure you get a lifetime boot!
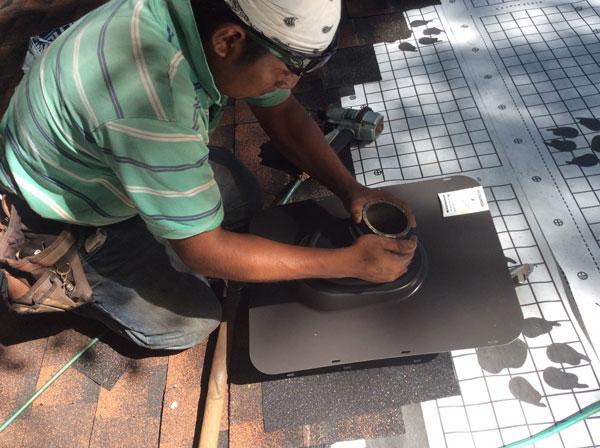
Installing LifetimeTool.com Boot to Seal a Pipe Penetration
After the boot is installed, the shingles are laid around it. Here’s a finished picture. We also used GAF’s ShingleMatch™ roof accessory paint to change the pipe from white to the brownish color in the photo. We can color match your pipes to help them blend in with the roof.
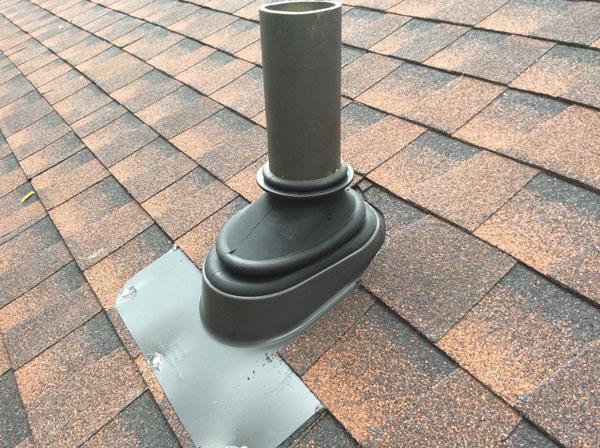
Finished Picture of Roofing Boot & GAF ShingleMatch™ Roof Accessory Paint on Pipe
On dormer walls and other roof protrusions, step-flashing is the method-of-choice to protect against leaks. Here’s a picture of some below.
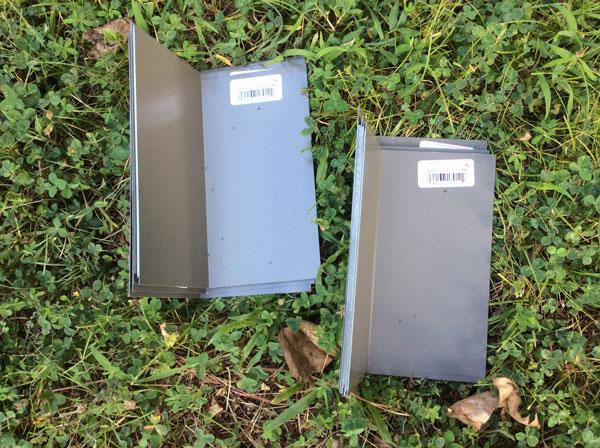
Step Flashing, When Used in Conjunction with Counter-Flashing Or Siding, Protects Against Leaks
Step Seven in the GAF Roofing Process – Adequate Attic/Decking Ventilation
With 9 out of 10 homes lacking proper ventilation, it’s definitely a subject that “matters.” Codes usually call for a 1:300 ratio of NFVA (Net Free Ventilating Area) compared to the footprint of your attic space. Best practice, and some locations, require 1:150. Caldwell’s Roofing tries to shoot for the more stringent 1:150 if possible. Experts agree that not only is ventilation critical, it’s important to do it right. That means enough ventilation, and having it placed at the right spots (at a 50:50 “balanced ratio”). All of this may sound technical to you, but it’s what keeps your AC bills down, helps prevent microbial growth in your attic, and extends the life of your shingles (helping prevent “heat blisters” which adversely affect the longevity of your roof). Childhood asthma and itchy eyes could mean your attic isn’t properly ventilated (and is allowing microbial growth)! Basically, you need intake at the lowest parts of your attic (or, specifically, at the “eaves”); and you need outtake of the air at the top of your attic (at the “ridge”). This can be engineered in a variety of ways, including soffit vents, vented drip edge, GAF’s Cobra FasciaFlow® product, ridge vents, shed roof vents, power turbines, and so on. However, ventilation is something for professionals, as amateurs often end up worsening their situation rather than helpingit. An example of a well-intentioned faux pas might be installing a power turbine to help “provide more outtake” in conjunction with your ridge vents. The problem is that air will now intake through the ridge vents, and outtake through your new power vent, effectively closing off the bulk of the attic air and making it stagnant. There’s a place for power turbines, but the point is, ventilation needs to be thoroughly understood before attempted.
In the photo below, the left picture shows installation of a shed roof vent where it ties into a two-story wall. The right picture shows a completed ridge vent.
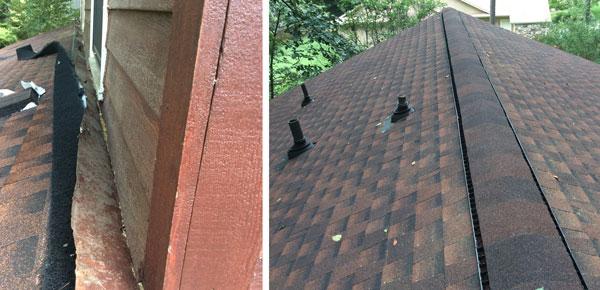
GAF Roofing Process Step Seven – Proper Ventilation
Step Eight in the GAF Roofing Process – Installing Hip and Ridge Shingles
We mentioned earlier that the edges of your roof are a vulnerable place (the reason for installing starter strips correctly). Additionally, the hips and ridges of a roof experience the most wind, and need to have enhanced products. It is right here, however, that many roofers skimp. They cut up 3-tab shingles (rated for 60 mph or 80 mph) and use them on a roof with dimensional shingles that is supposed to be covered up to at least 110 (or even 130) mph! GAF Factory Certified roofers understand the importance of hip and ridge shingles, and utilize a specialty shingle, such as GAF’s TimberTex®, to protect these vulnerable places on your roof.
Not only do cap shingles like TimberTex® better protect your roof, they greatly enhance the overall look of your roof by accentuating the lines. One single, loose piece of TimberTex® is featured in the image below. Notice the double-ply thickness, and the large dimensions.
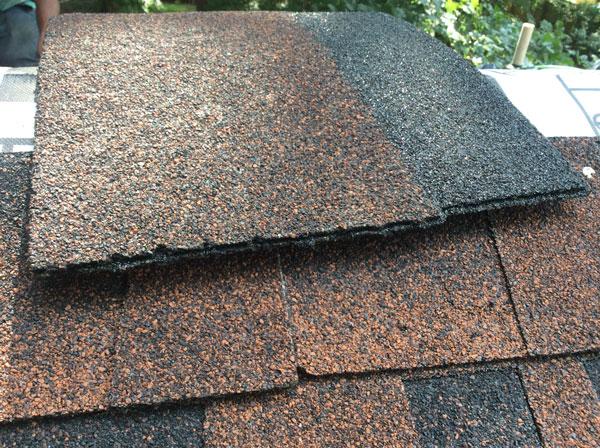
GAF Roofing Process Step Eight – Proper Hip and Ridge Shingles
Step Nine of our GAF Roofing Process – Clean Up, Shingle Recycling, and Final Inspection
Once you get your roof installed, you want to make sure that the place gets cleaned up. We utilize a magnet to remove nails, and carefully go over the yard to remove small bits of debris. The torn-off shingles will go to a recycling facility to be turned into roadway, and we will make a final inspection of the roof.
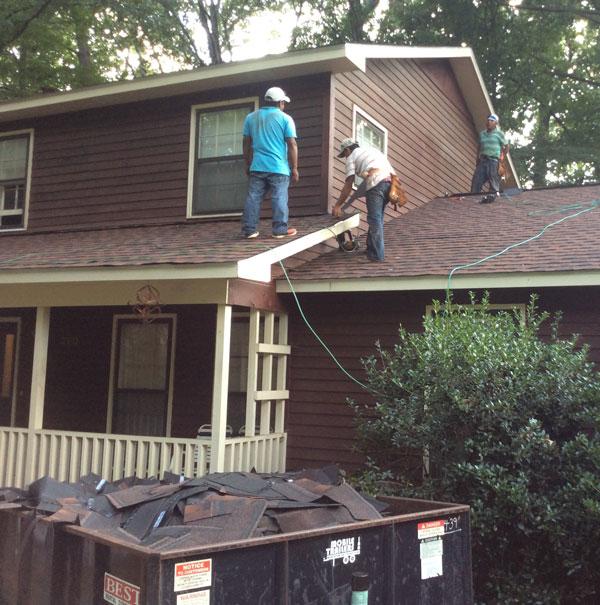
GAF Roofing Process Step Nine – Wrapping Up the Re-Roof
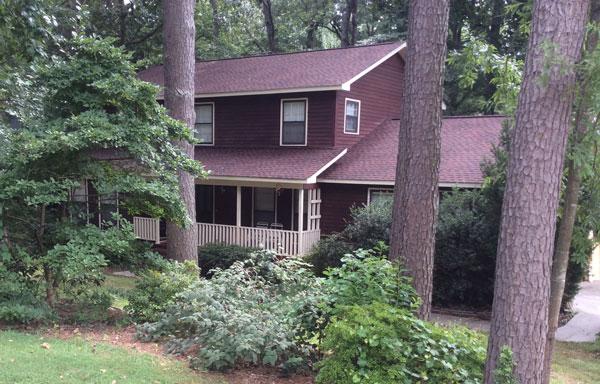
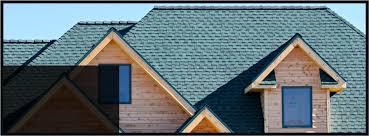
Here’s the Finished Roof! GAF Timberline® HD® “Hickory” with System Plus Warranty
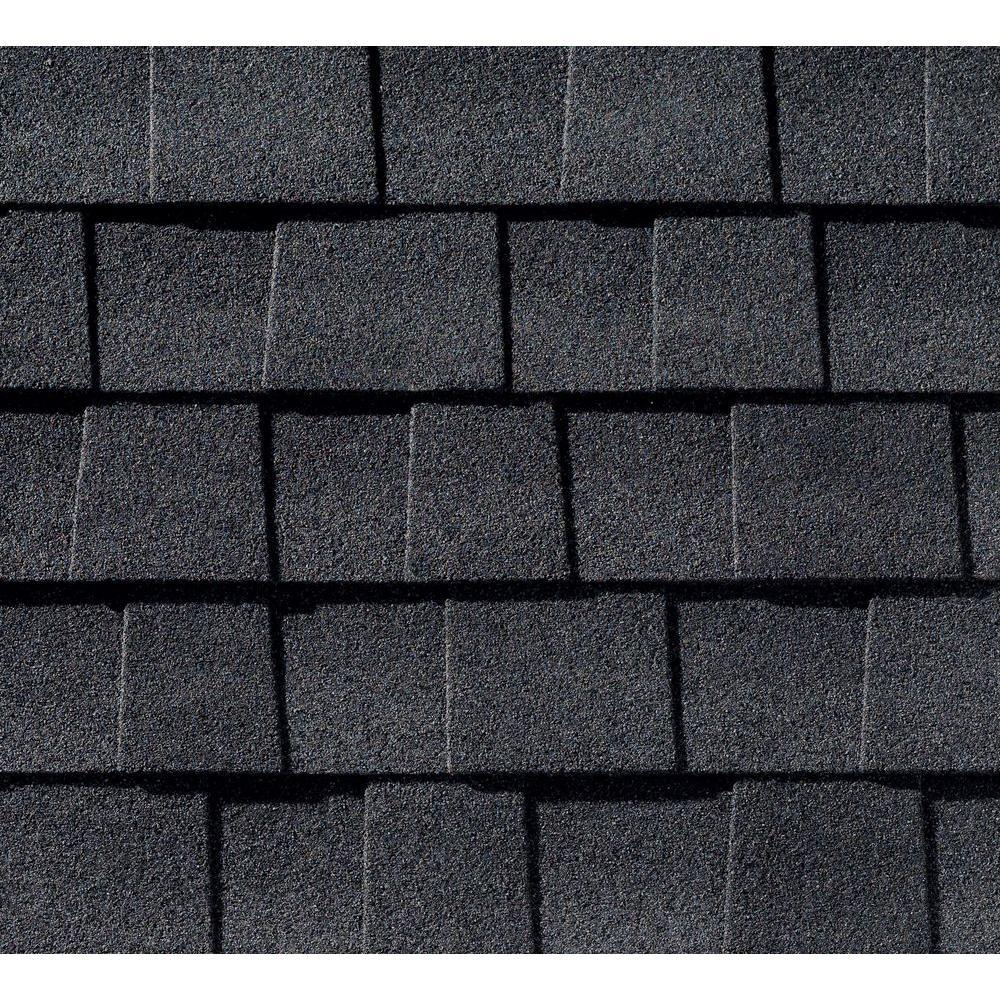
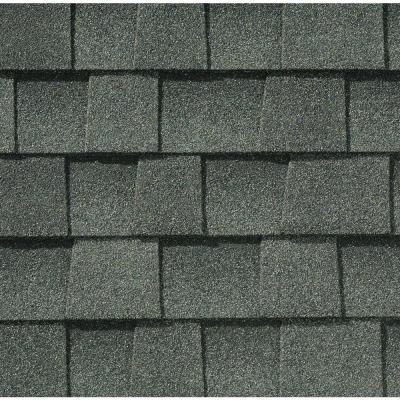
Timberline Natural Shadow Charcoal Lifetime Shingles

Timberline Natural Shadow Weathered Wood Lifetime Shingles
Timberline Natural Shadow Slate Lifetime Shingles
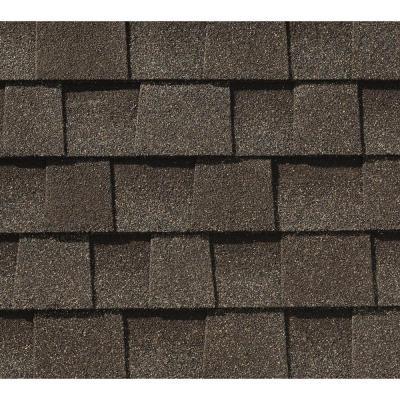
Timberline Natural Shadow Weathered Wood Lifetime Shingles
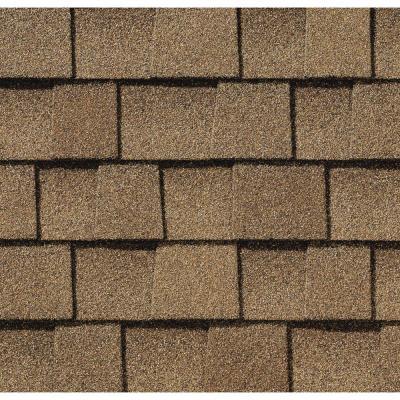
Timberline Natural Shadow Shakewood
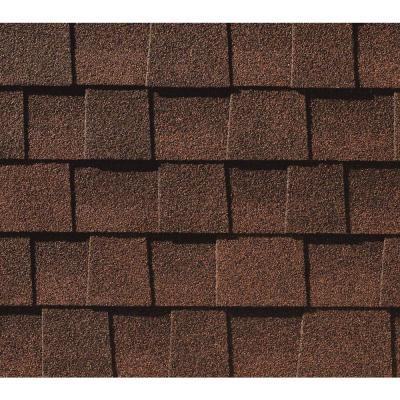
Timberline Natural Shadow Hickory Lifetime Shingles
- Areas We Serve
- Cities We Serve
Areas We Serve
75002 (Allen)
75006 (Carrollton)
75007 (Carrollton)
75009 (Celina)
75010 (Carrollton)
75013 (Allen)
75019 (Coppell)
75022 (Flower Mound)
75023 (Plano)
75024 (Plano)
75025 (Plano)
75028 (Flower Mound)
75032 (Rockwall)
75034 (Frisco)
75035 (Frisco)
75038 (Irving)
75039 (Irving)
75040 (Garland)
75041 (Garland)
75042 (Garland)
75043 (Garland)
75044 (Garland)
75048 (Sachse)
75050 (Grand Prairie)
75051 (Grand Prairie)
75052 (Grand Prairie)
75054 (Grand Prairie)
75056 (The Colony)
75057 (Lewisville)
75060 (Irving)
75061 (Irving)
75062 (Irving)
75063 (Irving)
75065 (Lake Dallas)
75067 (Lewisville)
75068 (Little Elm)
75069 (McKinney)
75070 (McKinney)
75071 (McKinney)
75074 (Plano)
75075 (Plano)
75077 (Lewisville)
75078 (Prosper)
75080 (Richardson)
75081 (Richardson)
75082 (Richardson)
75087 (Rockwall)
75088 (Rowlett)
75089 (Rowlett)
75093 (Plano)
75094 (Plano)
75098 (Wylie)
75101 (Bardwell)
75104 (Cedar Hill)
75114 (Crandall)
75115 (Desoto)
75116 (Duncanville)
75119 (Ennis)
75125 (Ferris)
75126 (Forney)
75132 (Fate)
75134 (Lancaster)
75135 (Caddo Mills)
75137 (Duncanville)
75141 (Hutchins)
75142 (Kaufman)
75146 (Lancaster)
75147 (Mabank)
75149 (Mesquite)
75150 (Mesquite)
75152 (Palmer)
75154 (Red Oak)
75157 (Rosser)
75158 (Scurry)
75159 (Seagoville)
75160 (Terrell)
75161 (Terrell)
75164 (Josephine)
75165 (Waxahachie)
75166 (Lavon)
75167 (Waxahachie)
75172 (Wilmer)
75173 (Nevada)
75180 (Mesquite)
75181 (Mesquite)
75182 (Sunnyvale)
75189 (Royse City)
75201 (Dallas)
75202 (Dallas)
75204 (Dallas)
75205 (Dallas)
75206 (Dallas)
75207 (Dallas)
75208 (Dallas)
75209 (Dallas)
75210 (Dallas)
75211 (Dallas)
75212 (Dallas)
75214 (Dallas)
75215 (Dallas)
75216 (Dallas)
75217 (Dallas)
75218 (Dallas)
75219 (Dallas)
75220 (Dallas)
75223 (Dallas)
75224 (Dallas)
75225 (Dallas)
75226 (Dallas)
75227 (Dallas)
75228 (Dallas)
75229 (Dallas)
75230 (Dallas)
75231 (Dallas)
75232 (Dallas)
75233 (Dallas)
75234 (Dallas)
75235 (Dallas)
75236 (Dallas)
75237 (Dallas)
75238 (Dallas)
75240 (Dallas)
75241 (Dallas)
75243 (Dallas)
75244 (Dallas)
75246 (Dallas)
75247 (Dallas)
75248 (Dallas)
75249 (Dallas)
75251 (Dallas)
75252 (Dallas)
75253 (Dallas)
75254 (Dallas)
75270 (Dallas)
75287 (Dallas)
75390 (Dallas)
75401 (Greenville)
75402 (Greenville)
75407 (Princeton)
75409 (Anna)
75415 (Ben Franklin)
75422 (Campbell)
75423 (Celeste)
75424 (Blue Ridge)
75428 (Commerce)
75432 (Cooper)
75441 (Enloe)
75442 (Farmersville)
75448 (Klondike)
75450 (Lake Creek)
75453 (Lone Oak)
75454 (Melissa)
75469 (Pecan Gap)
75474 (Quinlan)
75496 (Wolfe City)
76001 (Arlington)
76002 (Arlington)
76006 (Arlington)
76008 (Aledo)
76009 (Alvarado)
76010 (Arlington)
76011 (Arlington)
76012 (Arlington)
76013 (Arlington)
76014 (Arlington)
76015 (Arlington)
76016 (Arlington)
76017 (Arlington)
76018 (Arlington)
76020 (Azle)
76021 (Bedford)
76022 (Bedford)
76023 (Boyd)
76028 (Burleson)
76031 (Cleburne)
76033 (Cleburne)
76034 (Colleyville)
76039 (Euless)
76040 (Euless)
76041 (Forreston)
76044 (Godley)
76050 (Grandview)
76051 (Grapevine)
76052 (Haslet)
76053 (Hurst)
76054 (Hurst)
76058 (Joshua)
76059 (Keene)
76060 (Kennedale)
76061 (Lillian)
76063 (Mansfield)
76064 (Maypearl)
76065 (Midlothian)
76066 (Millsap)
76071 (Newark)
76073 (Paradise)
76078 (Rhome)
76082 (Springtown)
76084 (Venus)
76085 (Weatherford)
76086 (Weatherford)
76087 (Weatherford)
76088 (Weatherford)
76092 (Southlake)
76093 (Rio Vista)
76102 (Fort Worth)
76103 (Fort Worth)
76104 (Fort Worth)
76105 (Fort Worth)
76106 (Fort Worth)
76107 (Fort Worth)
76108 (Fort Worth)
76109 (Fort Worth)
76110 (Fort Worth)
76111 (Fort Worth)
76112 (Fort Worth)
76114 (Fort Worth)
76115 (Fort Worth)
76116 (Fort Worth)
76117 (Haltom City)
76118 (Fort Worth)
76119 (Fort Worth)
76120 (Fort Worth)
76123 (Fort Worth)
76126 (Fort Worth)
76127 (Naval Air Station-Jrb)
76129 (Fort Worth)
76131 (Fort Worth)
76132 (Fort Worth)
76133 (Fort Worth)
76134 (Fort Worth)
76135 (Fort Worth)
76137 (Fort Worth)
76140 (Fort Worth)
76148 (Fort Worth)
76155 (Fort Worth)
76164 (Fort Worth)
76177 (Fort Worth)
76179 (Fort Worth)
76180 (North Richland Hills)
76182 (North Richland Hills)
76201 (Denton)
76205 (Denton)
76207 (Denton)
76208 (Denton)
76209 (Denton)
76210 (Denton)
76225 (Alvord)
76226 (Argyle)
76227 (Aubrey)
76234 (Decatur)
76244 (Keller)
76247 (Justin)
76248 (Keller)
76249 (Krum)
76258 (Pilot Point)
76259 (Ponder)
76262 (Roanoke)
76266 (Sanger)
76426 (Bridgeport)
76431 (Chico)
76487 (Poolville)
76490 (Whitt)
76623 (Avalon)
76651 (Italy)
76670 (Milford)
copyright 2013 DFW Best Roofing
DFW Best Roofing
6709 Starnes Rd,
North Richland Hills,
TX, 76182
817-381-6855
We are a roofing company that tries hard to separate us from the competition.